Snowy feeder for the birds

IMG_0671[6430]
IMG_0672[6432]
IMG_0676[6428]

Snowy Day Bird Feeders
In the really cold weather birds use up more of their energy from food to keep warm, but the food is harder to find (bad combination!) Here is a little idea to help them out during this snowy time!

You will need:- 

Some wire (We used sticks of florists wire that we had unused from a Xmas project)

An apple

Dried fruit


Chop up your apple into fair-sized chunks. 

Fold a little bit of the end of the wire over to make a stopper

Thread on your dried fruit and apples

Hook the top of the wire over to make a hanging loop

Choose a bush in the garden to hang it on and wait for the birds to find it!


Which birds will come to your feeders?

Little x-mas reindeer <3

Things to gather together:- 

toilet roll tubes, 

brown paint, 

twigs or pipe cleaners for antlers,

black buttons felt or felt pen for eyes,

PVA glue,  

Sticky tape,

something for the nose - little bottle top, scrunched up red paper, red glitter, tiny Pom Pom, felt pen. 


Then!!! 

1.  Cut the toilet roll tube in half and paint your choice of reindeer colour. I did brown, but you could mix up different shades.  

2.  Break up your twigs into the right size for your tubes and stick them to the insides of the tubes with sticky tape.  

3.  Put eyes on your reindeer tubes and then the nose. I had some odd bits at the bottom of my craft box so I used a little red bell, a tiny bottle top, and different sized pom-poms that had fallen off another project.  I added a smile too!   


It helps if you leave each stage to dry in between because it’s really annoying if you knock your reindeer's nose off because the glue hasn’t set!

IMG_0521[5253]
IMG_0522[5254]
IMG_0523[5255]
IMG_0524[5256]

Make a twirly-whirler!

You will need:- 

some cardboard from the recycling, or a pizza base. 

Paint. 

Decorations. 

A bit of wool or string. 


Here we go! 

Draw a spiral shape from the edge of the circle, I imagined a coiled-up snake, then when you reach the centre you need the round off the end of the coil.
Make a small hole in the very centre of the rounded off part in the middle.  Then you need to cut on your spiral markings all the way to the middle.

Paint the whole of the cardboard, I did two shades of bluey-green, one shade on each side. I had to wait for each side to dry before I could do the other one. 

Then decorate one side - I did mine with splodges of different coloured paint and I sprinkled glitter onto the wet paint. (Make sure your glitter is from previous years, like mine is, or buy eco glitter so as not to cause harm to sea life when the glitter finds its way there).
Leave it to dry.  

You can now decorate the second side, I put little dabs of glue and stuck some stars onto it. When it dries, thread your string or wool through the hole in the middle of the circle and hang it up to sparkle!!!  

See where your decorations go, you could do stripes of paint, or stick foil milk bottle tops onto it. Maybe make one in Xmassy colours, or crisp winter colours, have fun!

1
2
3
4
5

Make an autumn hedgehog!

Things to gather together:-

Some cardboard (old cereal box)

PVA glue

Some leaves from the park or garden

(If you can’t get out to collect them, cut out leaf shapes from brown paper envelopes)


  1. Go into the garden, to the park, or anywhere that you can see some trees. Gather up some handfuls of leaves, trying to pick out the ones that are whole and not damaged.  Look under different trees and see if you can find different shapes and colours. Take them home and spread them out on an old cloth to dry out in the sun.
  2. Draw a hedgehog shape on the cardboard, the nose is a triangle and the body a big oval. Add some legs!
  3. Cut around your drawing so you have the shape of a hedgehog. If you wanted to you could paint or colour his face and feet brown. I didn’t because I liked the brown of the cardboard I used.
  4. When your leaves are dry, glue them one by one and cover your hedgehog with them. If you start at his bottom and work towards his head the leaves lay over each other like spikey spines! When you are happy with it, put a weight on it to stop the leaves curling up as they dry. I used a box with some tins in it.
  5. Leave it to dry (takes HOURS) but you do need to wait. Then you can give your hedgehog a nose and an eye! I’ve used small black buttons, you could colour them or use a bit of black felt.  Then paint glue really carefully all over the leaves, I was a bit worried here as they went all white, but when the glue dries it makes the leaves super shiny and less breakable.

There are lots of things you can do with your hedgehog, stick him on a card to give to someone for their birthday, or send to a grandparent, or stick on your bedroom wall (that’s where mine is going).  You could make a whole family of them!

Find some lovely leaves. What colour is your favorite?
Draw a hedgehog shape on a piece of cardboard
Cut the shape out but be careful!
Glue the leaves on to your hedgehog but leave the face clear
Draw a face on your hedgehog and he or she is ready for whatever adventure you have planned!

A flower for every month

Why not plant a "Bee restaurant" with one flowering plant for every month of the year!
If you don't have a border available for something like this, why not get 12 biggish plant pots?
Here are some ideas. The plants suitable for pots are marked with a P before the name, (P) means that you can put certain varieties in a pot but some will do better than others. Any perennials will do better in bigger pots as their roots will take up more space than an annual:

January
P Winter honeysuckle – Need to be fed and watered to survive in a pot. This is a climber that can reach up to 2.5 meters in height so provide it with a climbing frame. Will flower till spring. As a bonus, it produces berries in the autumn.

P Wild deadnettle -  The dead in the name refers to its lack of sting. Will flower from the end of January all the way till November.

(P) Mahonia – This evergreen shrub also produces berries

February
P Helleborus – This little beauty often is evergreen and loves a shady, not too windy spot in your garden.

P Crocus – Someone described this as a perfect plant for the “keen but clueless” as it is a VERY easy little bulb to grow.

P Snowdrops – Beautiful little perennial with small white flower.

March
P Ajuga genevensis – Flowers till mid-May. This plant is actually best to plant in pots as it spreads fast.

P Pulmonaria – Can sometimes start flowering as early as February and will keep going to April.

P Primula – Very hardy little beauty.

April
P Chives - Will flower in April/May. Herbaceous perennial plant.

P Cornflower – Will flower late April all the way to late summer.

P Lotus cornicalatus – Flowers till mid September

May
Achillea – Flowers till August

Cow parsley – Will flower till July

Calendula – Will flower till mid-summer.

June
P Borage - Will flower till September. In mild weather, it will continue to flower most of the year. Self-seeding annual.

(P) Lavender - Will flower from late spring.

P Snapdragons – Will flower till September

July
P Hyssop - Will flower sometimes as early as June all the way through to early autumn.

(P) Buddleja – Amazing shrub with beautiful flowers and a scent to die for. Requires a very big pot.

P Blue sea holly – Will flower till September

August
P Anemone – Will flower till late October

P Cosmos - If winter is very harsh, wrap the pot in something to protect the roots from the worst frost.

(P) Hollyhock – The dwarf veraities will survive in a pot. The larger ones will struggle if the pot is not big enough. Also, remember that the big varieties will grow up to 6ft tall.

September
P Ivy – Ivy is one of my all-time favorite plants. It comes in all shades of green and is a fantastic plant for wildlife, both for nectar and nesting depending on size. It does take a few year before the Ivy produces flowers.

P Salvia – As with all herbs having them in your garden will provide both you and pollinators with food 😀

P Ice plant – Will do best in full sun and does not like to stay damp for long periods.

October
(P) Abelia – This is another evergreen plant that will produce both flowers and berries. As most shrubs, it will do best if you give it some space so a very small post is not recommended.

P Rudbeckia – Prefers to have some room so don’t overcrowed and this plant will do well in a pot. Make sure it is fast draining.

Crocus speciosus – This will keep flowering sometime as early as September all the way to November.

November
P Wallflower – Will flower throughout the year and is ever so easy to care for.

P Sarcococca hookeriana – Will flower all the way to March and then produce berries. Highly fragrant flowers.

(P) Viburnum tintus – You will need to plant two of these to get it to produce berries but if you do remember that the berries are bad for humans. Birds however love them! Will need a big pot.

December
P Winter aconite – Will do well in a pot.

P Common Gorse – Will provide nectar all through the year. As most shrubs it will need a bigger pot.

(P) Winter flowering cherry – Since this is a tree it will need a substantial pot to be able to survive.

Build a hedgehog bunker!

You will need:

21 old bricks

3’x2’ paving slab

  1. Choose a sheltered and secluded spot where the ground is not likely to get too wet.
  2. Clear the area to the size of the slab and make it even.
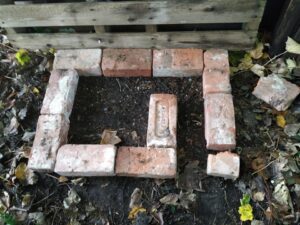
  3. Lay the bricks out as shown in the first photograph, they do not need to be set with mortar.
  4. Lay the second layer of bricks staggering the joints. One of the bricks will need to be cut into half.
  5. Carefully lower the slab onto the bricks. You may get a more snug fit if you put some sand on top of the bricks but this is not essential.
  6. Add garden materials on and around the bunker. Soil could be placed on the top, or leaves, as long as the entranceway is clear. Old logs could be placed around it, doubling up as a home for insects and a ready snack stop for your hedgehog!
  7. If you only have a 2’x2’ slab, keep the entrance outside the house, but could you cover it with some old tiles or slates?

What a lovely idea for children to be able to construct for themselves, with help where needed. Please send us your photographs to see your constructions!

Foot print trap

Have you ever wondered what goes on in your garden at night? Sometimes we hear squeaks and bird calls, other times we hear strange noises we can’t identify. If we are lucky enough to have snow, we might see all sorts of footprints, but we don’t get snow very often, so why don’t we make a trap to catch the footprints in the autumn!  

For this activity, you will need an old baking tray, or borrow a plant tray from a greenhouse. Maybe you could find something else to use, as long as it has low sides it will work.  

Then you need some fine sand - do you know anybody with a sandpit? Perhaps they would let you borrow some? Pour the sand into the tray and make it damp, smooth the top as carefully as you can, then place a bowl of meaty cat or dog food in the middle of it.  Place the tray in a quiet spot in your garden. Now comes the really hard bit, you need to wait overnight to check for the local wildlife to find and eat the food!  You can probably expect to find a few cat paw prints too!

What footprints will you find?

Here are some useful links to help you identify the prints
https://www.wildlifetrusts.org/how-identify/identify-tracks

https://www.woodlandtrust.org.uk/blog/2017/12/animal-tracks-snow-print-identification/

Apple gingerbread

Image by Rebekka D from Pixabay

APPLE GINGERBREAD

Reducing food waste is something that we all should try aiming for and what better way than making something absolutely delicious with those sad and wrinkly apples left in the fruit bowl?

Yum 🙂


225g cooking apples peeled cored and chopped with 25g soft brown sugar  (or raid the bottom of your fruit bowl for any apples that have gone a little wrinkly that need using up!)

50g soft brown sugar

100g golden syrup or date syrup

75g butter

150g self raising flour

2 tsp ground ginger

2 tsp ground cinnamon

1 beaten egg


This is a really lovely moist ginger cake, great served warm with ice cream or custard as a pudding or with a steamy cup of tea for an afternoon pick me up! Try and make the most of the last of the fallen Bramleys, or any apples slightly past their best to reduce food waste.  You could also add some grated lemon zest to this if you fancied it


Cook the apples with 25g sugar and 2 tbs water over a low hear until soft.  Beat to a purée and leave to cool. If you are using eating apples you don’t need to add any sugar.

Place  50g sugar, syrup and butter in a large pan and gently melt.

Sift the flour with the spices.

Stir in the sifted flour, beaten egg and apple purée into the melted mix.

Grease and line a loaf tin, pour mix in and bake at 180C for 40 mins until cooked through. Cool in tin slightly then turn out onto wire rack to cool.


Enjoy it!

How to make a Half – Term Birdfeeder!

You will need:-

Some birdseed,

Some crusts or stale bread

Dried fruit (see if you can gather the bits that have fallen out of the bag into the cupboard!)

Lard (about 40p from supermarkets)

Grated cheese - any stale or gone hard cheese is brilliant

Peanuts

String or wool

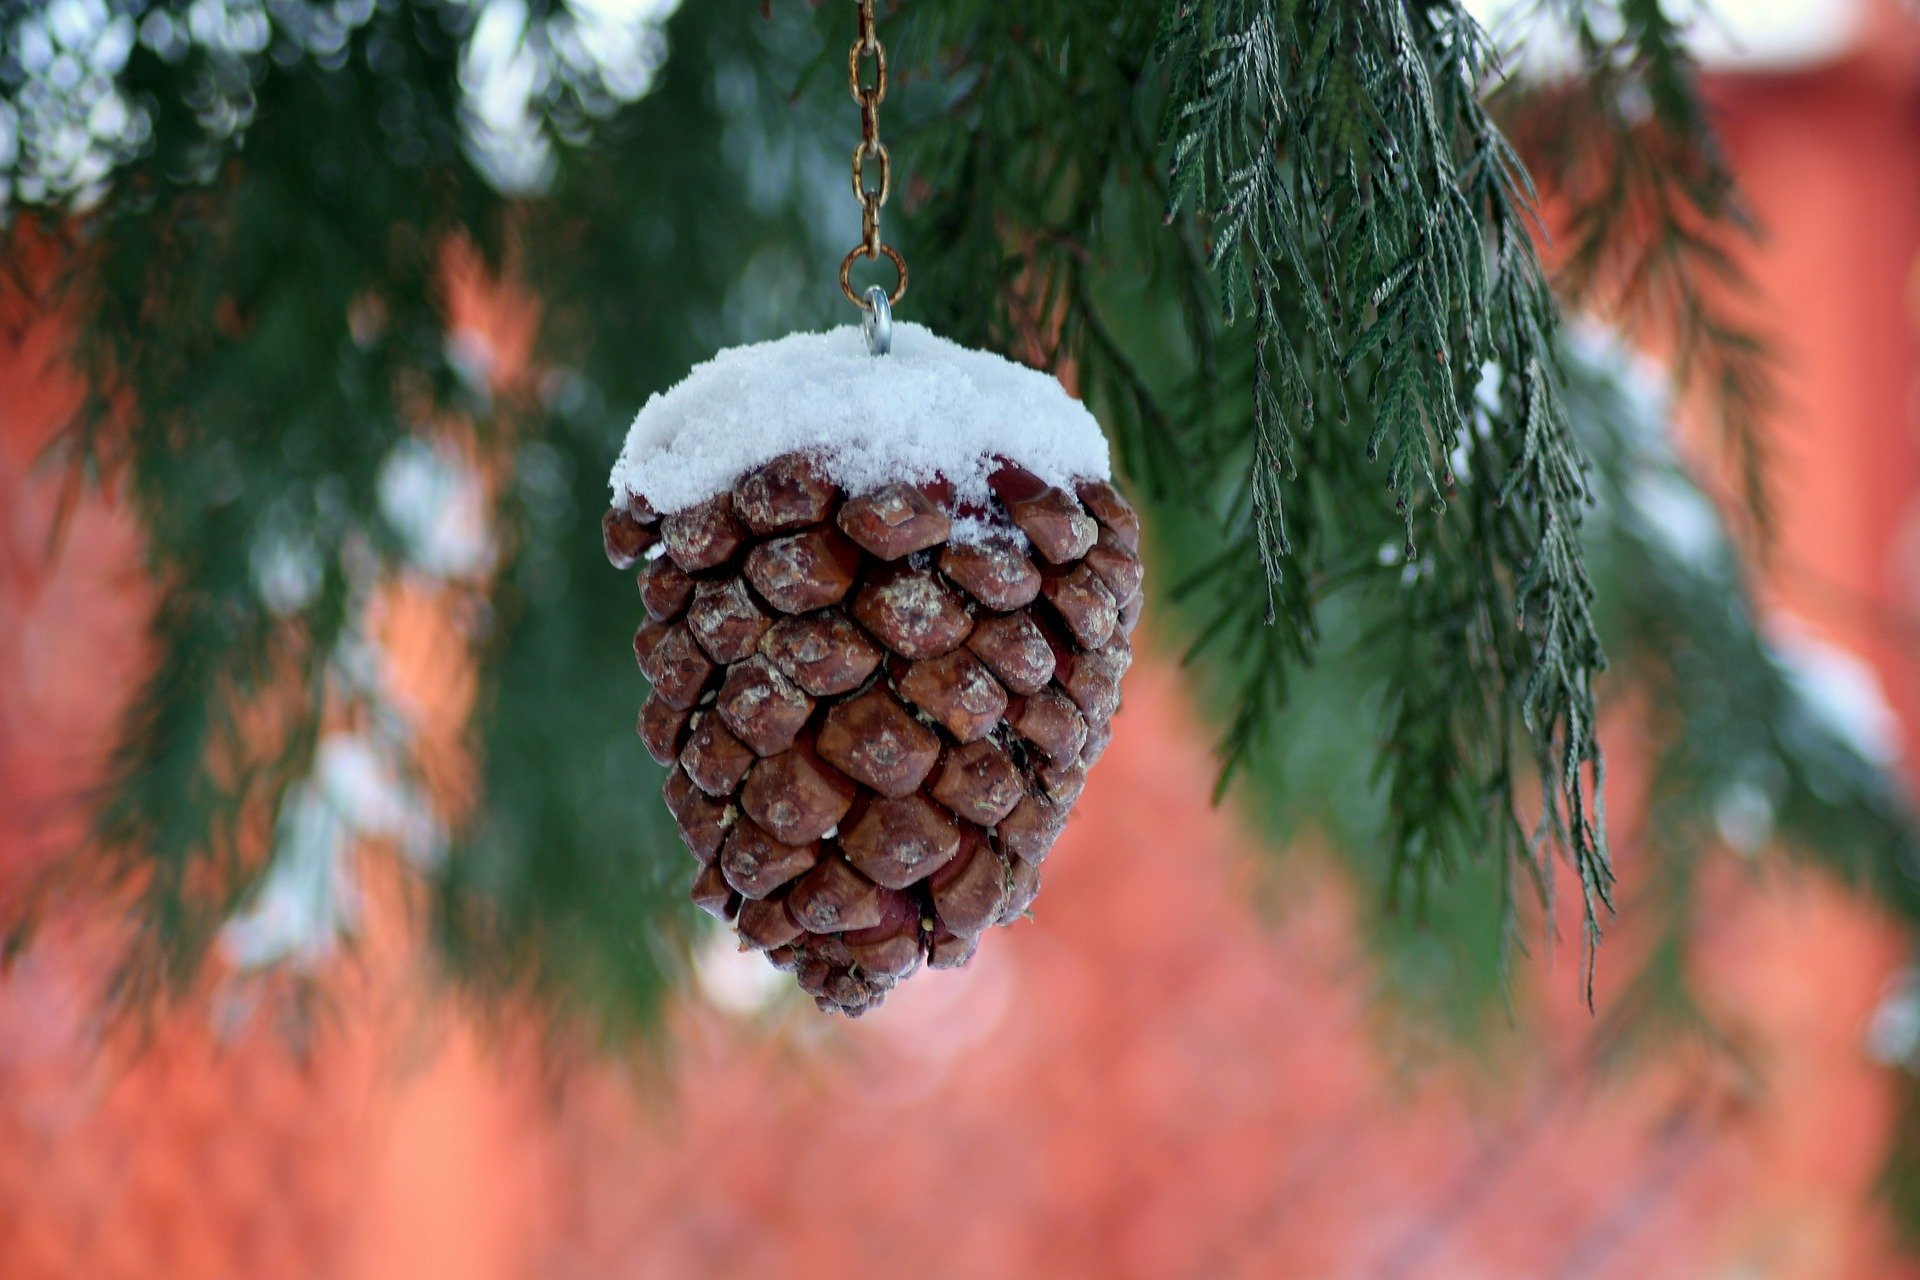
You will also need to get your wellies on and go out for a walk by some pine trees to gather up some fir cones to form your bird feeder. If you don’t fancy getting soggy, you could use an old yogurt pot, or a teacup. See what you can find in the recycling to use!


Let’s get going! Take your chosen bird feed container and tie some string around it, use the tip of the fir cone or the handle of the teacup. If you are using recycling items, you will need to punch a hole through them to put the string through. Remember to make your piece of string long enough to be able to hang the feeder from a bird table or tree branch.

Put the birdseed into a large bowl. Add the bread, grating it into smaller pieces, or if it isn’t too stale, pull it into small pieces with your fingers. Pop the dried fruit in, sultanas, raisins, whatever you have. Add the cheese and the peanuts and stir it all up. You will need an adult to melt the lard for you as it can get ferociously hot! Mix the melted fat into the dry ingredients and stir well, let it cool for 10 minutes, then after checking the mix isn’t too hot to handle, push the mix into the gaps in the fir cone, try and get it really full of the feed mix. This will make your hands feel super slimy! Alternatively, put the mix into your chosen container. Leave it in a cold place to set and then hang it outside and see how long it takes for the birds to find!

I wonder what type of bird the first one to come and feed will be?

Please let us know!!!